Showing posts with label Cooking with Kids. Show all posts

Monday, December 15, 2014

Recipe: Banana and Gingerbread Loaf

Every year, we would bake gingerbread biscuits without fail during Christmas time. In fact, we've already made it twice this year. Another great gingerbread recipe that we like, especially during the festive period is this banana and gingerbread loaf.


This is another easy stir-and-bake recipes which even your kids can do. It is very quick to make and thanks to the banana, it is wonderfully moist. And since bananas as well as black treacle and honey are added, I reduced the sugar from 115g to 60g, and it was sufficiently sweet for us. Super love the smell of the spices, and apparently this cake improves as it keeps, so you can make this a few days before Christmas day and keep it in an airtight container. Would be lovely to have a slice of this loaf on Christmas morning with a cuppa tea.


Moist and fragrant


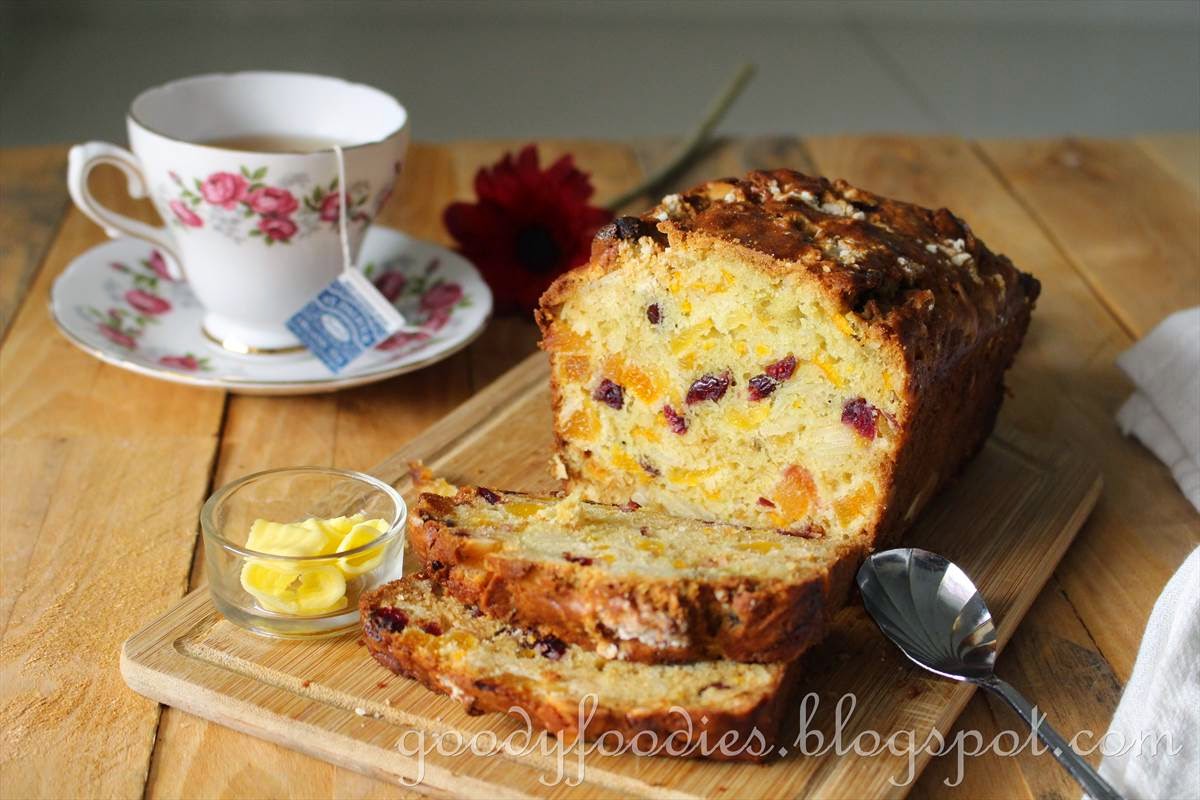
Banana and gingerbread loaf
Recipe by Baby Sumo, adapted from Baking cookbook
Preparation time: 10-15 minutes
Cooking time: 35-40 minutes
Serves 20

Ingredients
60g soft brown sugar
275g plain flour
4 tsp ground ginger
2 tsp mixed spice
1 tsp baking soda
4 tbsp corn oil
3 tbsp black treacle or molasses
1 tbsp honey
2 eggs
6 tbsp orange juice
3 ripe bananas
100g raisins

1. Preheat oven to 180°C (no fan). Lightly grease and line a 7" x 11" (18 x 28cm) baking tin.

2. In a large bowl, sift the flour, sugar, ground ginger, mixed spice and baking soda.

3. Make a well in the centre, and add the oil, black treacle, honey, eggs and orange juice. Mix thoroughly with a wooden spoon.

4. Mash the bananas, then add the raisins to it. Add this to the mixture in Step 3. Mix well. It should be a pouring consistency.

5. Pour the mixture into the lined baking tin and bake for 35-40 minutes until the centre springs back when lightly pressed.

6. Leave the cake in the tin to cool for 5 minutes, then turn out to a wire rack and leave to cool completely. Cut into 20 slices.

Note: The cake improves as it keeps, so if you can, store it for a few days before eating.


****************************


I am submitting this to the "Cook & Celebrate: Christmas 2014" event which I am co-hosting with Zoe of Bake for Happy Kids and Diana of The Domestic Goddess Wannabe. To join, simply cook or bake any Christmas recipes for the whole month of December 2014.

Your post must be a current post i.e. posted in December 2014 - please do not link older posts.Please mention our "Cook & Celebrate: Christmas 2014" event in your post and link back to Zoe of Bake for Happy KidsDiana of The Domestic Goddess Wannabe and Baby Sumo of Eat your heart out.

Happy cooking! Do check out the other bloggers recipe below:


* I am also submitting this post to "Cook-Your-Books #19" hosted by Joyce .

If you enjoyed reading my posts, LIKE me on Facebook! You can also follow me on Instagram (@babysumo) for more photo updates. Thanks :)

Friday, November 28, 2014

Best Wings Recipe: Sticky Gula Melaka Glazed Chicken Wings

Let's end November with a fantastic recipe - sticky gula melaka glazed chicken wings! After experimenting with lots of different marinades, this is by far the best chicken wing recipe I've tried. If you love wings, you gotta try this!


What I like about this recipe is definitely the ease of making and availability of the ingredients. I have everything I need in my kitchen pantry, and all I need to do is measure it out and mix it in a bowl and pour it over the chicken wings. So easy! Plus it tastes really really really good.


Sweet, salty, sticky, juicy wings... absolutely glorious! Worth getting your hands dirty, and they're so good you'll wanna lick your fingers afterwards. Yup, finger licking good they are!

My kids absolutely adore these chicken wings - my boy surprised me the other day when he ate one after another wing and kept telling me how yummy it was. He likes to do this "tick" sign with his fingers as a sign of his seal of approval. We usually serve this with a side of salad to keep things simple.


This is a recipe so easy that you can even assign it to your children to make. Baby D made the ones we had a couple of weeks ago - from marinating to arranging them on the baking tray, as well as making the salad (I helped him pit and peel the avocado but he did everything else). I make this recipe at least once a month now as my family tells me "more of this, please" ;)


Sticky Gula Melaka Glazed Chicken Wings
Recipe by Baby Sumo
Preparation time: 1 minute
Cooking time: 25-30 minutes
Serves 4

Ingredients
12 chicken wings, cleaned

For the marinade
1/4 cup light soy sauce
1 tbsp mirin or ginger wine
3 tbsp gula melaka (palm sugar) syrup or concentrate
1 tsp coarse black pepper
1/2 tsp shichimi powder
2 tbsp cooking oil


1. Place all marinade in a bowl, and mix well. Pour over the chicken wings and marinate for at least 6 hours in the fridge.

2. Preheat oven to 190C (roast mode). Line a baking tray with foil and arrange wings on tray in a single layer. Pour the marinade over the wings and cook for 25-30 minutes, until the meat is cooked through and the skin is sticky, and a beautiful golden brown.

3. Remove and serve immediately with some of the marinade leftover in tray as a dip.

Note: Gula melaka syrup is available in supermarkets- they usually come in a 500ml bottle, costing about RM5-7 depending on brand.


Avocado, lettuce and cherry tomatoes salad
For the salad
1 ripe avocado
1 baby butterhead lettuce
6-8 cherry tomatoes, halved
1/4 lemon

For the dressing
2 tbsp extra virgin olive oil
1 tbsp white balsamic vinegar
1 tbsp honey
Salt

1. To pit the avocado, first you need to find the stalk and remove it. Hold it horizontally, with a knife through the centre until you hit the seed then move the knife in a circular motion until you go all the away around. Twist the avocado halves in opposite direction and it will come apart easily into 2 halves. Sink the knife into the avocado seed and remove. Squeeze lemon juice all over to avoid discoloration. Chop the avocado into bite-sized chunks. Season with salt.

2. Place ingredients for dressing a bowl and whisk well to mix.

3. Place avocado, butterhead lettuce and cherry tomatoes into a salad bowl and then pour over dressing and toss. Season with more salt as necessary and serve immediately.


The wings and salad that Baby D made ;)


If you enjoyed reading my posts, LIKE me on Facebook! You can also follow me on Instagram (@babysumo) for more photo updates. Thanks :)

*This recipe was featured on Asian Food Channel's Facebook page on 5 December 2014.

Sunday, October 12, 2014

Recipe: Apricot, Cranberry & Nut Loaf

You should see my boy's face all lit up when I picked him up from school and told him that we were baking a loaf/cake. It's one of his favorite afternoon activities, spending the afternoon in the kitchen with me.


Today we are baking an apricot, cranberry and nut loaf - an easy and quick kids-friendly recipe as it only requires measuring out the ingredients and mixing it in a large bowl with a wooden spoon. For this loaf, you can use any of your favorite dried fruits or nuts.

The batter is then poured into a loaf tin and baked for 55-60 minutes. We let it cool a little before we had a few slices for tea time. And boy, was it delicious!

This would be perfect for Christmas!

Mmmmm it sure smells good, says baker boy!


A really moist loaf, studded with our favorite fruits and nuts. The orange rind lends a lovely aroma to this loaf. We like eating this loaf warm, but it is also very good once cooled completely. Good with a cuppa tea or coffee, and slather on some extra butter if you like. :)

Thanks Baby D for making this wonderful loaf for the whole family!


A couple of announcements - For the whole month of November 2014, Zoe from Bake for Happy Kids, Grace from Life can be simple and I (Yen) from Eat Your Heart Out will be cooking and baking Bobby Flay's recipes for "Cook Like a Star" event.

Zoe from Bake for Happy Kids, Diana from The Domestic Goddess Wannabe and I will be hosting a Christmas event for the whole month of December and a Chinese New Year (CNY) event for the whole month of February 2015. Do join us and hope to see your recipes then! :)


Apricot, cranberry and nut loaf
Recipe by Baby Sumo, adapted from Baking cookbook
Preparation time: 10 minutes
Cooking time: 55-60 minutes
Makes 1 loaf


Ingredients
115g dried apricots, roughly chopped
1 large orange
85g dried cranberries
100g caster sugar
85ml oil
2 eggs, lightly beaten
250g plain flour
2 tsp baking powder
1/2 tsp salt
1 tsp baking soda
55g almond flakes

1. Preheat oven to 180°C (no fan). Grease and base-line a 9x5 inch loaf tin with baking paper.

2. Using a vegetable peeler, remove the orange rind only. Then, finely chop the orange rind with a sharp knife. Place into a bowl with the cranberries and apricots.

3. Squeeze the peeled orange. Place into a measuring jug, then top up with hot water to obtain 175ml liquid.

4. Pour the orange juice mixture (from Step 3) into the apricot mixture (from Step 2). Stir in the sugar, oil and eggs. Set aside.

5. In another bowl, sift the flour, baking powder, baking soda and salt. Fold the flour into the apricot mixture (from Step 4) in 3 batches.

6. Stir in the almonds.

7. Spoon mixture into prepared tin, and bake in preheated oven for 55-60 minutes, or until a skewer inserted in centre comes out clean. If the loaf browns too quickly, then protect the top with a sheet of foil. Allow to cool in tin for 10 minutes, then turn out to a wire rack to cool completely.


Note: For younger kids, you can help them with peeling and chopping the orange rind.


Been drinking St. Dalfour's organic peppermint tea lately, and really love it!


*I am linking this to Cook-Your-Books #17 hosted by Joyce of Kitchen Flavours.


If you enjoyed reading my posts, LIKE me on Facebook! You can also follow me on Instagram (@babysumo) for more photo updates. Thanks :)

Monday, October 6, 2014

Two-ingredient instant pizza dough + Recipe for Mini Vegetarian Pizzas

Sometime ago, a friend sent me a photo on Instagram which claims that you can make a pizza dough with only two-ingredients. She asked me if it was legit, and I replied that I would give it a go and let her know! And guess what... it totally works!


Quick and healthy mini vegetarian pizzas


In our home, we enjoy making our own pizzas - in the past we have always used tortilla wraps as a base for our pizzas... quick and easy! This does require a little more work and time but still it is one of the easiest pizza dough you can make from scratch.

So what you'll need are two ingredients - self-raising flour and Greek yogurt. And lucky for me, I also have the assistance of a cute mini chef, Baby D. Simply mix the ingredients together to get a workable dough, then roll it out. No proofing required!


We decided to make 4 mini vegetarian pizzas - two of them topped with cheese, cherry tomatoes and fresh basil leaves from the garden, and another two with cheese, zucchini and homemade pesto. Then, simply bake them in the oven for 15-18 minutes.

And what you get are pizzas which are soft, fluffy and delicious. Baby D loved it so much that he wants to make these again this week.


Look at how soft and fluffy the pizza dough is!


Now that you've got an instant pizza dough recipe under your repertoire, you can top them with any toppings which you like and throw a pizza party at home ;)

Love that we can make pizza dough from scratch in under 30 mins. And it's so easy, even your kids can make it.


Two-ingredient instant pizza dough
Recipe by Baby Sumo
Preparation time: 5-10 minutes
Cooking time: 15-18 minutes
Makes 4 mini pizzas


Ingredients
1 1/4 - 1 1/2 cup self raising flour
3/4 cup Greek yogurt


1. Place 1 cup of flour into a large bowl, then make a well in the centre. Add yogurt and then mix with a wooden spoon/spatula until you get a dough.

2. Gradually add more flour until you get a workable dough. The dough should not be sticky and comes away easily from the side of the bowl.

3. Dust your work surface with some flour, then roll out into a large round for large pizza or cut into several small rounds for mini pizza.

4. Top with preferred toppings and bake in a preheated 200°C oven for 15-18 minutes.


Note: You can also make your own self raising flour - ratio is 1 cup plain flour + 2 tsp baking powder.


Mini vegetarian pizza
1 quantity instant pizza dough (as above)

4 tbsp tomato paste/puree
Lots of mozzarella cheese
6-8 cherry tomatoes, sliced
1/4 zucchini, sliced
Fresh basil leaves
2 tbsp homemade basil pesto (see recipe here)


1. Roll the pizza dough out and using a round cookie cutter, cut into 4 mini pizzas. Place the dough onto a baking tray lined with baking paper.

2. Using a knife, spread the tomato paste/puree onto the pizzas. Top with generous amount of mozzarella cheese.

3. On 2 pizzas, we topped them with cherry tomatoes and another 2, we topped them with sliced zucchini and a drizzle of olive oil. Season with some salt. Bake in preheated oven (200°C - no fan) for 15-18 minutes, until the cheese is lightly golden.

4. For the cherry tomato ones, garnish with torn basil leaves. For the zucchini ones,top with a dollop of homemade pesto each. Serve immediately.


If you enjoyed reading my posts, LIKE me on Facebook! You can also follow me on Instagram (@babysumo) for more photo updates. Thanks :)

Sunday, August 31, 2014

The Borneo Culinary Journey @ Gaya Island Resort, Malaysia + Recipe for Hinava

One of our favorite activities while we were holidaying at Gaya Island Resort was The Borneo Culinary Journey, whereby we got to learn how to make traditional Borneo/Sabahan dishes with the chef's guidance. We attended this 2 hour hands-on cooking class with our kids and they thoroughly enjoyed it.


The interactive cooking session takes place at Fisherman Cove restaurant's kitchen whereby we started off with introduction to ingredients for the two dishes that we were preparing that morning, with the chef explaining the spices and fresh produce to us. At these cooking sessions, guests have the opportunity to learn local family recipes from various ethnic groups and the session will end with a dining session, communal style with other participants.


Our instructor for the morning, Chef Miguel is personable, interesting and made our session very fun. He taught us two dishes, Hinava (a popular Sabah-style ceviche dish of Kadazan-dusun ethnic origin) and Piaren ah Manuk (chicken in grated coconut, a native dish of Iranun tribe in Kota Belud).

Chef Miguel shows us how to plate the dish, fine-dining style :)


With our supervision, both kids had fun mixing the ingredients for the hinava, blending the paste for the chicken dish, cooking the chicken dish and then plating the two dishes, fine-dining style with guidance from Chef Miguel.


The Borneo Culinary Journey is definitely a worthwhile experience, should you wish to learn more about the cuisine of the local ethnic groups. We certainly had a fun time - great for family bonding! :)


We get a certificate each at the end of the cooking session.. well done!


*******

In this post, I will be sharing the recipe for the Hinava dish that we prepared during the cooking session. Hinava is a raw fish salad, often called a Sabah-style ceviche. For this dish, we used the Sabah chilli which is more fragrant. Since there is no cooking involved, use the freshest fish you can find. The fish is marinated in lime juice which will "cook" the fish (the citric acid causes the protein in the seafood to become denatured, the same way as heat does.)

Hinava is a very appetizing, refreshing salad, which is tangy and spicy, with a distinctive ginger taste. Love it!


Hinava Recipe
Recipe courtesy of YTL Hotels
Preparation time: 20 minutes
Serves 2

Ingredients
300g raw white fish, sliced thinly
120ml lime juice/vinegar
3-4 small red shallots, sliced or finely chopped
2 inch young ginger, julienned
5 green/red bird's eye chilli, finely chopped
Salt, to taste (1/8 tsp)
Sugar, to taste (1/8 tsp)

1. Place all ingredients in a small bowl or plastic container. Mix well and marinate for 10 mins. Season with salt and sugar. (Note: You can add the birds eye chillis in small amount at a time, adjusting the spiciness to personal preference)


Chef at work


2. Cover and place in fridge to chill for at least 10 mins before serving. Taste again before serving, and adjust seasoning as required.


Website: http://www.gayaislandresort.com/

Location: Gaya Island Resort, Malohom Bay, Pulau Gaya, Tunku Abdul Rahman Marine Park, 88000 Kota Kinabalu, Sabah, East Malaysia.

Tel: +60 18 939 1100


If you enjoyed reading my posts, LIKE me on Facebook! You can also follow me on Instagram (@babysumo) for more photo updates. Thanks :)

Monday, August 4, 2014

Recipe: Baked Egg Florentine (Gordon Ramsay)

Everyday, I would pick Baby D up from school and we would come home and have a snack/lunch together before he takes his afternoon nap. 


Baked egg Florentine with toast and freshly squeezed orange juice


Being egg lovers, we decided to try out Gordon Ramsay's baked egg Florentine recipe. For convenience, you can buy a packet of ready-to-eat young spinach leaves. While Baby D wilted the spinach in the frying pan with some butter, the oven was being preheated. Crack an egg (or two, depending on how hungry you are) in the centre, and spoon some creme fraiche or Greek yogurt all over. It adds a little extra creaminess to the dish, but you can skip it if you want - I find that my kids prefer it without. Then, simply bake it until the egg white has set and egg yolk is still soft and runny.


Quick, easy and nutritious too :)


We like having it with some toast for a more substantial meal - Baby D especially likes dipping the bread in the soft yolk.

Mmmmm, I like it, mummy, says the boy ;)


Baked Egg Florentine
Recipe by Baby Sumo, adapted from Gordon Ramsay's "Fast Food"
Preparation time: 2 minutes
Cooking time: 10-12 minutes
Serves 2

Ingredients
1 tbsp salted butter
250g spinach leaves, washed and dried
Sea salt and freshly ground black pepper
2 large eggs
3 tbsp creme fraiche or Greek yogurt
Nutmeg, for grating


1. Preheat the oven to 180°C (no fan).

2. In a saucepan, melt the butter over medium high heat. Once melted, add the spinach leaves, and season with salt and pepper. Stir until just wilted.

3. Divide spinach among 2 buttered ramekins or baking dishes, making a well in the centre. Crack an egg each in the centre, season with salt and pepper. Spoon the creme fraiche or yogurt around the egg, then grate nutmeg (if using).


4. Bake in preheated oven for 9-10 minutes, until the egg whites are set and yolks are still runny and soft. Serve immediately with toast.


**************


* I am submitting this to the "Cook Like Gordon Ramsay" event which I am co-hosting with Zoe of Bake for Happy Kids and Mich of Piece of Cake. To join, simply cook or bake any recipe from any Gordon Ramsay websites or cookbooks for the whole month of August 2014. You can link your posts at one of the host's pages.

Your post must be a current post i.e. posted in August 2014 - please do not link older posts.Please mention Cook like a Star in your post and link back to Zoe of Bake for Happy Kids, Mich of Piece of Cake and Baby Sumo of Eat your heart out.

Happy cooking! Do check out the other bloggers recipe below:


* I am also submitting this post to "Cook-Your-Books #15" hosted by Joyce.

If you enjoyed reading my posts, LIKE me on Facebook! You can also follow me on Instagram (@babysumo) for more photo updates. Thanks :)