Showing posts with label Healthy Meals. Show all posts

Thursday, January 29, 2015

Recipe: Pesto Pasta with Oven-Roasted Chicken

I've said it before and I'll say it again - it's amazing having a herb garden at home. Furthermore, my kids love eating herbs, be it raw (straight from the plant) or used in our cooking.

One of our favorite herbs from the garden is sweet basil, which we love making pesto with. Don't worry though if you do not own a basil plant, you can always get a pack of basil at the supermarket for under RM2 and make this.


Pesto Pasta with Oven-Roasted Chicken


Making pesto is super simple, especially if you are using a food processor. Just place everything in there and blitz until you get a paste. To make our dinner more substantial, we served our pesto pasta with oven-roasted chicken. You can also use a grill pan to cook it, though using the oven would be less messy. We use chicken breast as it's leaner and healthier, but equally delicious!


Pesto pasta is one of my kid's favorite pasta so they were delighted to see this at the dinner time. Loved the marinade for the chicken, making the chicken really tasty and tender. This recipe is a keeper, one I would be making over and over again! :)

Funny pasta-eating faces!


Pesto pasta with oven-roasted chicken
Recipe by Baby Sumo
Preparation time: 15 minutes
Cooking time: 20 minutes
Serves 4


Ingredients
2 quantity homemade pesto (recipe here)
300-350g dried spaghetti
Salt and freshly ground pepper

To garnish
Parmesan cheese, freshly grated
8-10 cherry tomatoes, halved
A handful walnuts
Basil leaves, roughly torn
Extra virgin olive oil

For the chicken
1 boneless, skinless chicken breasts
1/2 tbsp cooking oil

For the marinade
1 clove garlic, crushed to a paste
1 large pinch of salt
1 tbsp olive oil
Juice of 1/4 lemon
1 tsp whole cumin seeds, roughly ground
1/2 tsp smoked paprika


1. First, clean the chicken breast and then cut each piece into half lengthwise and crosswise. This will cut down cooking time. Place marinade ingredients in a bowl, and mix well, then rub all over the chicken breasts and leave to marinade for at least 2 hours in the fridge.

2. To make the pesto: please refer to recipe here. You can place all ingredients in a food processor to save time. Once the pesto is ready, set aside in the fridge with a covering of olive oil.


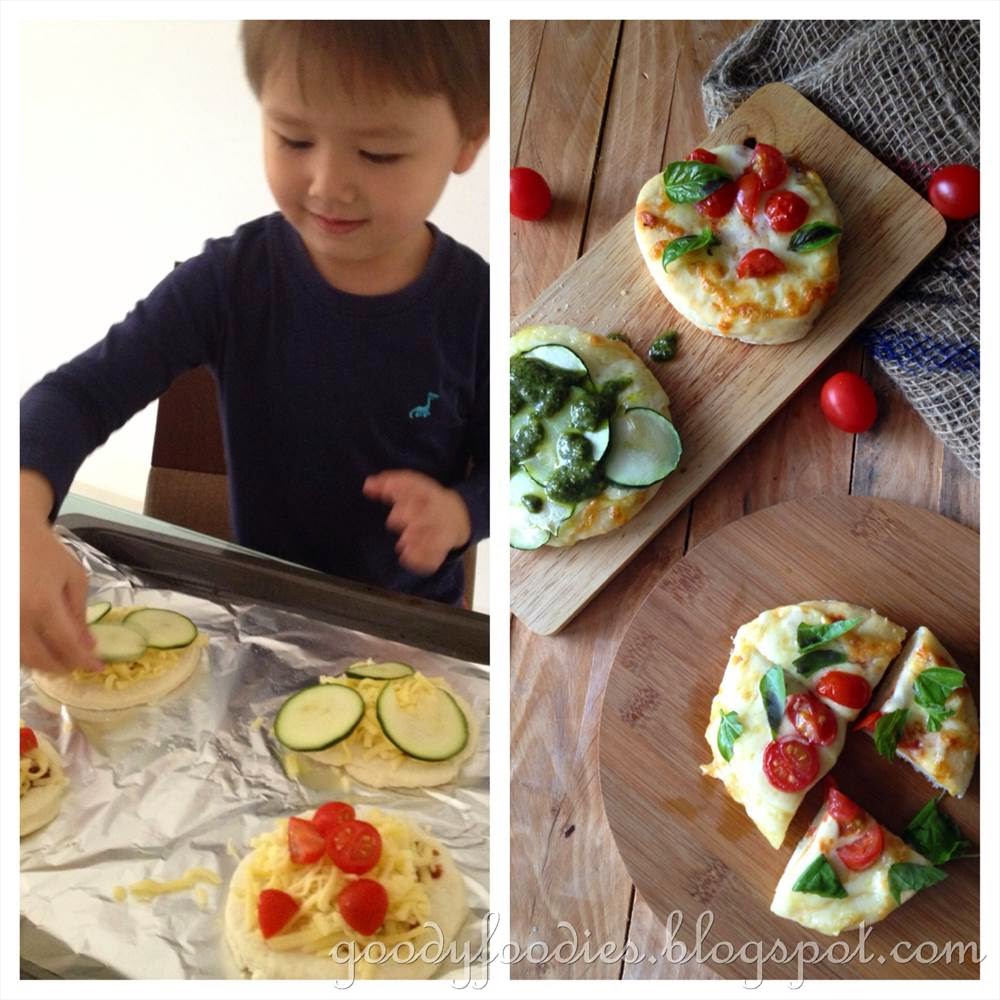
My kids always have fun making pesto at home!


3. For the chicken:
To cook in oven: Preheat oven to 200°C (roast mode). Line the baking tray with foil, and brush lightly with oil. Then place marinated chicken on the tray in a single layer. Roast in preheated oven for 12-15 minutes, until cooked through. Season chicken with more salt, if necessary.

To cook on hob: Alternatively, heat 1/2 tablespoon of oil in a large grill pan over high heat. Once the pan is hot, place chicken down, and turn heat down to medium heat. Cook the chicken breasts just until golden brown and cooked through, about 5-6 minutes each side. Season chicken with more salt, if necessary.


4. To prepare the pasta: Cook the spaghetti in a large pot of boiling salted water over medium high heat until al dente, stirring occasionally to prevent it from sticking, about 8-10 minutes. Drain the spaghetti and place in a large bowl. Then add the pesto and toss to coat. Add some olive oil (about 1 tbsp) if it seems a little dry.

5. To serve: Using a two-pronged carving fork, swirl some of the pasta around the fork. Slide the pasta off the fork and mound it in the center of a plate. Repeat for each serving.  Cut each chicken breast on a slight diagonal into 6-8 thin slices. Arrange the chicken slices alongside the spaghetti.

6. Garnish with the cherry tomatoes, shaved Parmesan cheese,  walnuts and torn basil leaves.


(Note: We do like our pasta with lots of pesto, however if you're having this for the first time, try with 1 quantity pesto and gradually add more to your liking).


*I am submitting this to LTU: Noodles/Pasta hosted by Anne of My Bare Cupboard.


If you enjoyed reading my posts, LIKE me on Facebook! You can also follow me on Instagram (@babysumo) for more photo updates. Thanks :)

Thursday, January 22, 2015

Recipe: Avocado Salad with Anchovy & Egg

Avocados, love 'em or hate 'em? I definitely am on the LOVE side. I could eat them everyday. So much so, that I decided to try my luck and plant an avocado tree so that I can have endless supply of avocados. So far it's around 80cm tall but I heard it takes about 10 years before it fruits, so wish me luck! ;)

A friend saw me posting lots of photos of avocado salads and said to me "what avocados should I buy cos all the ones I had in the past weren't really nice." Over here, you can get South African, New Zealand, or Australian Hass, and in my experience, the Australian Hass are consistently good. After that piece of advice, I got a Facebook message from my friend thanking me for the tip. Definitely my pleasure.. yet another avocado lover is born!

So here's another avocado salad from my kitchen. Hubby bought me a jar of anchovy fillets in olive oil when we were doing our Christmas shopping (in case I needed it someday) so I decided to add it into my avocado salad. The salad consists of 1 ripe avocado, cherry tomatoes, some butterhead lettuce leaves, boiled egg and anchovy fillets (best to mash it up and spread it around the salad as it's quite salty if you try eating a whole fillet on its own).


Avocado salad with anchovy & egg

I do love how the saltiness of the anchovies complimented the rest of the salad. And this definitely bodes well with meeting my weight loss target for 2015.


Avocado Salad with Anchovy & Egg
Recipe by Baby Sumo
Preparation time: 5 minutes
Cooking time: 10 minutes (for egg)
Serves 1 or 2 as side salad


Ingredients
1 ripe avocado
1/4 lemon or 1 calamansi lime
3-4 cherry tomatoes, halved
4-5 butterhead lettuce leaves, halved
1 boiled egg, quartered
2-3 anchovy fillets in olive oil, light mashed
1 tsp olive oil from anchovy fillet jar (optional)
Salt and freshly ground pepper


For the dressing
1 tbsp extra virgin olive oil
1/2 tbsp white balsamic vinegar
Salt


1.  To pit the avocado, first you need to find the stalk and remove it. Hold it horizontally, with a knife through the centre until you hit the seed then move the knife in a circular motion until you go all the away around. Twist the avocado halves in opposite direction and it will come apart easily into 2 halves. Sink the knife into the avocado seed and remove. Peel off skin. Squeeze lemon juice (or calamansi lime juice) all over to avoid discoloration. Chop the avocado into bite-sized chunks. Season with salt.

2. In a bowl, place olive oil and balsamic vinegar and whisk well. Season dressing with salt.

3. Arrange lettuce, avocado and tomatoes in bowl, then drizzle over dressing. Top with boiled egg and anchovies. Drizzle over the olive oil from anchovy fillet, if using. Ground some black pepper and serve.


If you enjoyed reading my posts, LIKE me on Facebook! You can also follow me on Instagram (@babysumo) for more photo updates. Thanks :)

Tuesday, January 20, 2015

Recipe: Chinese Black Bean Soup 烏豆湯

Growing up as a child, at dinner time, we often had rice, vegetables, meat, egg and soup. I love drinking Chinese soups - they're warming, comforting as well as nourishing.

One of my favorite Chinese soups is this black bean soup 烏豆湯. You can easily get black bean in supermarkets but we always get ours from Eu Yan Sang (RM9 for 300g). My mum always pre-soaks the beans for 1 hour before cooking, hence I followed her instructions when I cook with black beans too. You do lose some of the colour from pre-soaking the beans, but in a way, this turned out to be a good thing as my kids prefer brown-coloured soup rather than black.


When I make soup, I usually use either chicken carcass (which you can get easily and cheaply from the wet market) or chicken breast (the soup will be less oily, hence more healthy). With chicken carcass, you will need to skim off the scum and excess oil. I also like adding some dried oysters and dried scallops, as well as onions as they make the soup taste super sweet and delicious! Everyone should try making Chinese soups - it's so easy, it's all a matter of dumping the ingredients into a pot, bring it to the boil and then once it's boiling, lower to simmer and cook for 2-3 hours. I certainly love having a bowl of soup with my dinner :)


My happy, healthy kids!


Chinese Black Bean Soup 烏豆湯
Recipe by Baby Sumo
Preparation time: 5 minutes
Cooking time: 2-3 hours
Serves 4-6


Ingredients
2l water
3 chicken carcasses, chopped into rough chunks
200g black bean 黑豆
3 dried oysters
A large handful dried scallops
3 large onions, quartered
1/8 tsp salt


1. Place black beans in a bowl and cover with cold water. Leave to soak for 1 hour. Drain and set aside.

2. In a large pot, place water, black beans, dried oysters, dried scallops, onions and chicken carcass. Bring to the boil over medium high heat. Once boiling, lower to low heat and simmer for 2-3 hours. Skim off any excess oil or scum using a ladle. Season with salt, to taste.

3. Serve, as part of your meal.

Note: You can use 1.5 chicken breast in lieu of the chicken carcass. If you prefer the soup to be a darker shade, then do not presoak the black beans. Just rinse and add into Step 2.


Do check out the recipe for Chinese ABC soup with sweetcorn  here.


If you enjoyed reading my posts, LIKE me on Facebook! You can also follow me on Instagram (@babysumo) for more photo updates. Thanks :)

Friday, December 26, 2014

Recipe: Avocado Salad with Tobiko and Honey-Balsamic Vinaigrette

Hi everyone, how did your Christmas celebrations go? We had a really fantastic day , from good food to good company and good fun. 

For Christmas dinner, I was very pleased to have served this amazing spread to my family and guests - we had perfectly cooked tenderloin steaks or balsamic roasted chicken (for those who didn't take beef), served with crispy roasted potatoes, Brussel sprouts and baby carrots, and avocado and tomato salad with tobiko and crabstick. The salad was really good, hence I am sharing the recipe with you all today.  


For this salad, you can use either tobiko (flying fish roe) or ebiko (shrimp roe). Other ingredients include butterhead lettuce, wild rocket, cherry tomatoes, crabstick and ripe avocados, and then dressed with my all-time favorite salad dressing, honey-balsamic vinaigrette. Light, tasty and easy to throw together! Looks wonderfully festive too :)

Avocado and tomato salad with tobiko and crabsticks


Avocado salad with tobiko and honey-balsamic vinaigrette
Recipe by Baby Sumo
Preparation time: 10-15 minutes
Serves 8

Ingredients
2 medium ripe Hass avocados
1/2 lemon, juice only
1 1/2 butterhead lettuce (about 150g), halve the leaves
30g wild rocket
125g cherry tomatoes, halved
4-5 crabsticks
5-6 tbsp tobiko


For the dressing
6 tbsp extra virgin olive oil
3 tbsp white balsamic vinegar
3 tbsp honey
Salt and freshly ground pepper


1. To pit the avocado, first you need to find the stalk and remove it. Hold it horizontally, with a knife through the centre until you hit the seed then move the knife in a circular motion until you go all the away around. Twist the avocado halves in opposite direction and it will come apart easily into 2 halves. Sink the knife into the avocado seed and remove. Peel off skin. Squeeze lemon juice all over to avoid discoloration. Chop the avocado into bite-sized chunks. Season with salt.

2. Place the olive oil, balsamic vinegar and honey in a bowl and whisk until well combined. Season with salt and pepper.

3. Lightly blanch the crabsticks in hot water for 30 seconds, then drain and shred lengthwise.

4. Place avocado, lettuce, rocket and cherry tomatoes in a bowl. Top with crabsticks and tobiko, then pour over dressing. Garnish with some lemon cress. Toss and serve.


****************************


I am submitting this to the "Cook & Celebrate: Christmas 2014" event which I am co-hosting with Zoe of Bake for Happy Kids and Diana of The Domestic Goddess Wannabe. To join, simply cook or bake any Christmas recipes for the whole month of December 2014.

Your post must be a current post i.e. posted in December 2014 - please do not link older posts.Please mention our "Cook & Celebrate: Christmas 2014" event in your post and link back to Zoe of Bake for Happy KidsDiana of The Domestic Goddess Wannabe and Baby Sumo of Eat your heart out.

Happy cooking! Do check out the other bloggers recipe below:


If you enjoyed reading my posts, LIKE me on Facebook! You can also follow me on Instagram (@babysumo) for more photo updates. Thanks :)

Monday, November 17, 2014

Recipe: Avocado salad with Tomatoes, Shallots and Toasted Cumin Vinaigrette (Bobby Flay)

I love avocadoes and would eat them every single day if I could. I always have a few sitting on my kitchen counter, so they definitely came in handy when I saw this avocado salad recipe from Bobby Flay.

Avocado salad with Tomatoes, Shallots and Toasted Cumin Vinaigrette


If you like guacamole, you should certainly try this. It tastes very similar to guacamole since the ingredients used share a similarity (think toasted cumin seeds, tomatoes, shallots). Also got to harvest the rocket and mizuna from my herb garden to add to this salad. :)

This is quick and easy to put together, and love the tangy cumin vinaigrette that is poured over the salad. A refreshing salad that I would love to eat any day.

Brilliant colours - so want to eat this again!


Avocado salad with Tomatoes, Shallots and Toasted Cumin Vinaigrette
Recipe by Baby Sumo, adapted from Bobby Flay
Preparation time: 10-15 minutes
Serves 2

Ingredients
10 cherry tomatoes, halved
2 ripe medium Hass avocados, halved, pitted, peeled, and cut into 1-inch chunks
2 shallots, thinly sliced
1 quantity toasted cumin vinaigrette, recipe follows
1 cup arugula / rocket leaves
1/2 teaspoon ground cumin
2 tbsp freshly chopped cilantro leaves


For the vinaigrette:
1 tbsp fresh lime juice
1/2 tbsp rice wine vinegar
1/2 tbsp honey
1/2 tsp cumin seeds, lightly toasted
1 tbsp chopped fresh cilantro leaves
2 tbsp olive oil
Salt and freshly ground pepper


1. To make the vinaigrette, whisk together the lime juice, rice wine vinegar, honey and cumin together, then slowly add the oil and whisk until emulsified. Add the cilantro leaves and season with salt and pepper. Note: Do not use a blender to make this vinaigrette.

2. Place the salad ingredients in a large bowl, then add the vinaigrette. Toss, check the seasoning and serve immediately.


***********************

I am submitting this to the "Cook Like Bobby Flay" event which I am co-hosting with Zoe of Bake for Happy Kids and Grace of Life Can Be Simple. To join, simply cook or bake any recipe from any Bobby Flay websites or cookbooks for the whole month of November 2014.

Your post must be a current post i.e. posted in November 2014 - please do not link older posts.Please mention Cook like a Star in your post and link back to Zoe of Bake for Happy Kids, Grace of Life Can Be Simple and Baby Sumo of Eat your heart out.

Happy cooking! Do check out the other bloggers recipe below:


If you enjoyed reading my posts, LIKE me on Facebook! You can also follow me on Instagram (@babysumo) for more photo updates. Thanks :)

Tuesday, November 4, 2014

Recipe: Spaghetti Pasta with Zucchini, Crispy Bacon & Parmesan

My kids love pasta, so much so that it has become a weekend staple in our home. Their favorite pasta is spaghetti and I am often surprised at how much they can eat.


Scenario #1
Mummy: "Kids, do you want to go out to the mall and eat some nice food?"
Kids: Mummy can we stay home, and can you make us pasta for lunch?

Scenario #2
Mummy: Do you want to go for dim sum today? (Note: They love siew mai)
Kids: Don't want siew mai.... can we have pasta instead.... the one with the bacon, pleaseeeeee?

Scenario #3
Mummy: Do you want mummy to cook something else for a change?
Kids: Nooooooo, we want pasta. Mummy's pasta is the best.

That's basically how it goes every weekend. My kids will request for pasta every weekend. As a mummy, I'm only glad to see them eating well and enjoying their food. :)


Here's the recipe for their (current) favorite pasta, spaghetti with zucchini and bacon. It's one of those pasta dishes that everyone loves. Simple and quick to make too.


Spaghetti pasta with zucchini and bacon
Recipe by Baby Sumo
Preparation time: 10 minutes
Cooking time: 10-12 minutes
Serves 4

350g spaghetti pasta
5 streaky bacon (about 125g), sliced thinly
1 zucchini (about 300g), sliced thinly
4 cloves garlic, finely chopped
3 tbsp extra virgin olive oil
Salt and freshly ground black pepper
Freshly grated Parmesan, to garnish
Fresh parsley or basil (optional)


1. In a pot of salted water, cook the spaghetti pasta according to pack instructions, about 8-10 minutes until al dente. Remove from heat and drain, run under cold water to stop from cooking further.

2. Heat the olive oil in a large frying pan or wok on medium high heat. Add bacon and cook for 3-4 minutes, until crispy and golden brown. Remove and set aside.

3. Using the same pan, add the garlic and cook for a minute until golden brown. Then, add the zucchini, and cook for 3-4 minutes until it turns translucent. Add the drained pasta, season with salt and pepper as necessary and give it a quick stir.

4. Using a two-pronged carving fork, swirl some of the pasta around the fork. Slide the pasta off the fork and mound it in the center of a plate. Repeat for each serving. Top with crispy bacon, as well as parsley and basil (if using). Grate Parmesan cheese all over.


If you enjoyed reading my posts, LIKE me on Facebook! You can also follow me on Instagram (@babysumo) for more photo updates. Thanks :)

Friday, October 24, 2014

Recipe: Mee suah 麵線 noodle soup with prawns, chicken and tofu

We have been getting quite a lot of rain here in KL and the rainy weather is definitely making me crave for hot soupy noodles. A delicious noodle dish that we like is mee suah 麵線 in a chicken or ikan bilis (dried anchovies) broth.


Mee suah noodle soup


This is a dish I have been eating since I was a little girl. We have it when we want a simple and quick meal. Also, when I'm feeling under the weather, my mum always makes this for me - it is comfort in a bowl.

Now, my kids also often request this- their favorite version consists of prawns, sliced chicken, tofu and choy sum. Tasty, nutritious and best of all, this is something you can whip up in under 30 minutes.


Most Chinese mums (or dads) would have cooked this for their family at some point in their life


The brand of mee suah that I buy is in a red packaging from a company called Chin Peng Mee Factory with two dragons on the front. For some reason, most mee suah comes in red packaging (perhaps to signify prosperity). Mee suah noodles cook very quickly, so do not overcook or else you will end up with a mushy lump.


Mee suah 麵線 (flour vermicelli noodles) with prawns, chicken and tofu
Recipe by Baby Sumo
Preparation time: 5 minutes
Cooking time: 20-22 minutes
Serves 4

Ingredients
4 pc flour vermicelli noodle (mee suah 麵線)
600-700ml ikan bilis stock
1 tbsp cooking oil
2 cloves garlic, finely chopped
200g choy sum, washed and cut into 2 inch lengths
A handful spring onions, cut into 1.5 inch lengths
20 king prawns, peeled and deveined with tails intact
100g chicken breast, sliced thinly (or pork)
1 tofu, cubed
6 shitake or Chinese mushrooms, rehydrated and sliced thinly
Salt, to season

To serve - Condiment
6-8 cloves garlic, finely chopped
4-5 cili padi, deseeded and chopped
Soy sauce


1. To make the ikan bilis stock, simply add about 1 large handful of ikan bilis (rinsed) with 700ml water and simmer on medium heat for about 10 minutes. Strain away ikan bilis and discard.

2. In a wok or large saucepan, heat the oil over medium high heat. Add the garlic, and cook for 2 minutes, until lightly browned. Then, add the mushroom and stir fry for about 1 minute, then add the ikan bilis stock (or chicken stock) and bring to the boil.

3. Add the chicken and cook for about 2-3 minutes, until it is cooked through. Then, add the mee suah noodles and cook for about 2 minutes (depending on which noodle you use) and quickly add in the king prawns, tofu and choy sum and cook for a further 1 minute, until the prawn are cooked. Finally, taste and season with salt as required, and just before serving, add in the spring onions and cook for about 10-15 seconds. Divide into bowls and serve with a condiment of garlic, chilli and soy sauce.

Note: You can also use chicken stock instead of ikan bilis. See here for a light chicken stock recipe.


If you enjoyed reading my posts, LIKE me on Facebook! You can also follow me on Instagram (@babysumo) for more photo updates. Thanks :)

Monday, October 6, 2014

Two-ingredient instant pizza dough + Recipe for Mini Vegetarian Pizzas

Sometime ago, a friend sent me a photo on Instagram which claims that you can make a pizza dough with only two-ingredients. She asked me if it was legit, and I replied that I would give it a go and let her know! And guess what... it totally works!


Quick and healthy mini vegetarian pizzas


In our home, we enjoy making our own pizzas - in the past we have always used tortilla wraps as a base for our pizzas... quick and easy! This does require a little more work and time but still it is one of the easiest pizza dough you can make from scratch.

So what you'll need are two ingredients - self-raising flour and Greek yogurt. And lucky for me, I also have the assistance of a cute mini chef, Baby D. Simply mix the ingredients together to get a workable dough, then roll it out. No proofing required!


We decided to make 4 mini vegetarian pizzas - two of them topped with cheese, cherry tomatoes and fresh basil leaves from the garden, and another two with cheese, zucchini and homemade pesto. Then, simply bake them in the oven for 15-18 minutes.

And what you get are pizzas which are soft, fluffy and delicious. Baby D loved it so much that he wants to make these again this week.


Look at how soft and fluffy the pizza dough is!


Now that you've got an instant pizza dough recipe under your repertoire, you can top them with any toppings which you like and throw a pizza party at home ;)

Love that we can make pizza dough from scratch in under 30 mins. And it's so easy, even your kids can make it.


Two-ingredient instant pizza dough
Recipe by Baby Sumo
Preparation time: 5-10 minutes
Cooking time: 15-18 minutes
Makes 4 mini pizzas


Ingredients
1 1/4 - 1 1/2 cup self raising flour
3/4 cup Greek yogurt


1. Place 1 cup of flour into a large bowl, then make a well in the centre. Add yogurt and then mix with a wooden spoon/spatula until you get a dough.

2. Gradually add more flour until you get a workable dough. The dough should not be sticky and comes away easily from the side of the bowl.

3. Dust your work surface with some flour, then roll out into a large round for large pizza or cut into several small rounds for mini pizza.

4. Top with preferred toppings and bake in a preheated 200°C oven for 15-18 minutes.


Note: You can also make your own self raising flour - ratio is 1 cup plain flour + 2 tsp baking powder.


Mini vegetarian pizza
1 quantity instant pizza dough (as above)

4 tbsp tomato paste/puree
Lots of mozzarella cheese
6-8 cherry tomatoes, sliced
1/4 zucchini, sliced
Fresh basil leaves
2 tbsp homemade basil pesto (see recipe here)


1. Roll the pizza dough out and using a round cookie cutter, cut into 4 mini pizzas. Place the dough onto a baking tray lined with baking paper.

2. Using a knife, spread the tomato paste/puree onto the pizzas. Top with generous amount of mozzarella cheese.

3. On 2 pizzas, we topped them with cherry tomatoes and another 2, we topped them with sliced zucchini and a drizzle of olive oil. Season with some salt. Bake in preheated oven (200°C - no fan) for 15-18 minutes, until the cheese is lightly golden.

4. For the cherry tomato ones, garnish with torn basil leaves. For the zucchini ones,top with a dollop of homemade pesto each. Serve immediately.


If you enjoyed reading my posts, LIKE me on Facebook! You can also follow me on Instagram (@babysumo) for more photo updates. Thanks :)

Tuesday, September 2, 2014

Recipe: Stir fried udon with prawns, scallops and sweet chilli sauce + WORLDFOODS Giveaway

Hi everyone! I am delighted to share that WORLDFOODS products are now available to purchase at all Cold Storage stores (including Penang and Johor), Jason and BIG supermarket.

Why WORLDFOODS products? If you're a busy parent / someone working full time with little time to cook / someone who wants to whip up a quick meal in the kitchen, WORLDFOODS is simply perfect for you. Through my collaborations with WORLDFOODS this year, I have discovered many interesting & delicious sauces which I can use for my everyday cooking ie. for stir fries or as a marinade or dipping sauce. They're really convenient and easy to use. Furthermore, WORLDFOODS sauces are food allergens free, trans-fat free and gluten free with no artificial preservatives, coloring or flavouring,  and are suitable for vegetarians, vegans, coeliacs and Muslims.

To celebrate WORLDFOODS being stocked in these new locations, we are doing a giveaway whereby 3 bottles of WORLDFOODS Dipping/Stir-Fry sauce will be given away to 1 lucky winner.

Please enter your details onto Rafflecopter App below as well as commenting in this blogpost "I want to enter this giveaway" with your name and email address - you can gain more entries by completing additional steps in Rafflecopter. This contest is open to those living in Malaysia and Singapore, and will run until 7 September 2014 23:59. The winner will be contacted via email.


************************

I very rarely use bottled sauces unless they are a trusted brand like WORLDFOODS which contain no artificial preservatives, coloring or flavouring. Furthermore, it is very convenient and easy to use and I can whip up delicious meals for family in less than 30 minutes.


We like having "fast food" for lunch, and by fast food, I don't mean McDonalds but a delicious plate of pasta/noodles. Back in my uni days, I used to make a noodle dish with sweet chilli sauce (which I loved a lot) hence I am recreating it with udon and WORLDFOODS' Thai sweet chilli sauce with kaffir lime.


For this dish, I used king prawns, scallops and chicken as well as adding in lots of vegetables (carrots, sugar snap peas and cabbage) so this is a pretty healthy dish to serve to your family. The sauce is aromatic and tangy, making this noodle dish very appetizing. Total prep and cooking time is under 20 minutes.


My boy loved it :)


Nom nom nom!


Stir fried udon with prawn, scallop and sweet chilli sauce
Recipe by Baby Sumo
Preparation time: 5-8 minutes
Cooking time: 8-10 minutes
Serves 2


Ingredients
1 tbsp cooking oil
2 cloves garlic, finely chopped
200g fresh udon
8-10 sugar snap peas, topped and tailed and halved lengthways
1 cabbage leaf, finely sliced
1/4 carrot, peeled and julienned
80g chicken breast, sliced
8 king prawns, peeled and deveined with tails intact
6 scallops (I used Hokkaido)
1 tbsp light soy sauce
1/2 tsp mirin
2 tbsp WORLDFOODS Thai sweet chilli with kaffir lime sauce
Salt

To garnish
Spring onion, finely chopped
Toasted white sesame seeds


1. Bring a pot of water to the boil. Once boiling, add the udon and cook for about 2 minutes. Drain and refresh under cold water. Set aside.

2. In a wok, heat oil over medium high heat. Add garlic, and cook for 1 minute until lightly golden. Add chicken breast and cook for another 1 - 1 1/2 minute, until cooked through.

3. Add cabbage, sugar snap peas, carrot, prawn and scallops, and stir fry for 1-2 minutes. Add in udon, and season with light soy sauce, mirin and WORLDFOODS Thai sweet chilli with kaffir lime sauce. Taste, and season with more salt as necessary.

4. Garnish with spring onion and sesame seeds and serve immediately.


*Other locations you can get WORLDFOODS products from are:  Village Grocer (Bangsar Village 1, Sunway Giza, Mt Kiara), Jaya Grocers (Intermark, Empire Shopping, Plaza Jelutong) and Hock Choon @ Ampang.


a Rafflecopter giveaway

If you enjoyed reading my posts, LIKE me on Facebook! You can also follow me on Instagram (@babysumo) for more photo updates. Thanks :)